Wednesday, February 29, 2012

Yes! More Meatballs! On top of spaghetti!

On top of spaghetti, all covered with cheeeeeeese. You won't want to lose THESE meatballs.  I know the second meatball recipe in a week, but when I was working on the Swedish meatballs, I thought I could change the sauce a little and hey look spaghetti and meatballs. I'm so glad I didn't and we found this recipe. It made my house smell like Estelle Getty was gonna walk in any minute and say, "Picture it, Sicily, 1937.." 

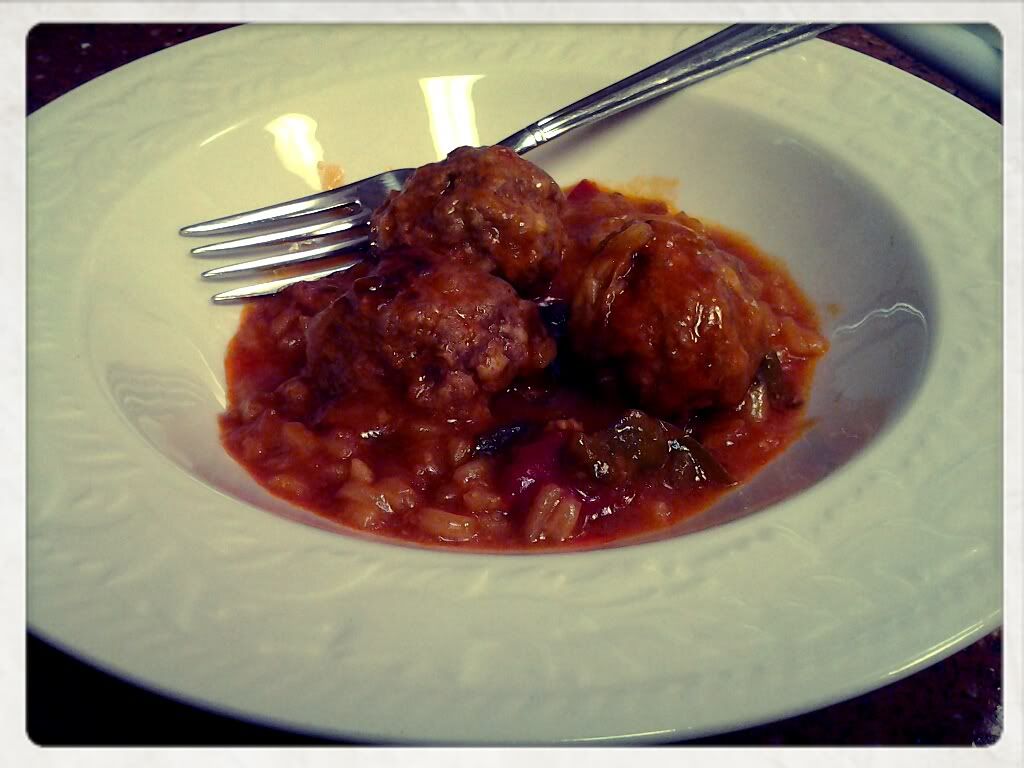
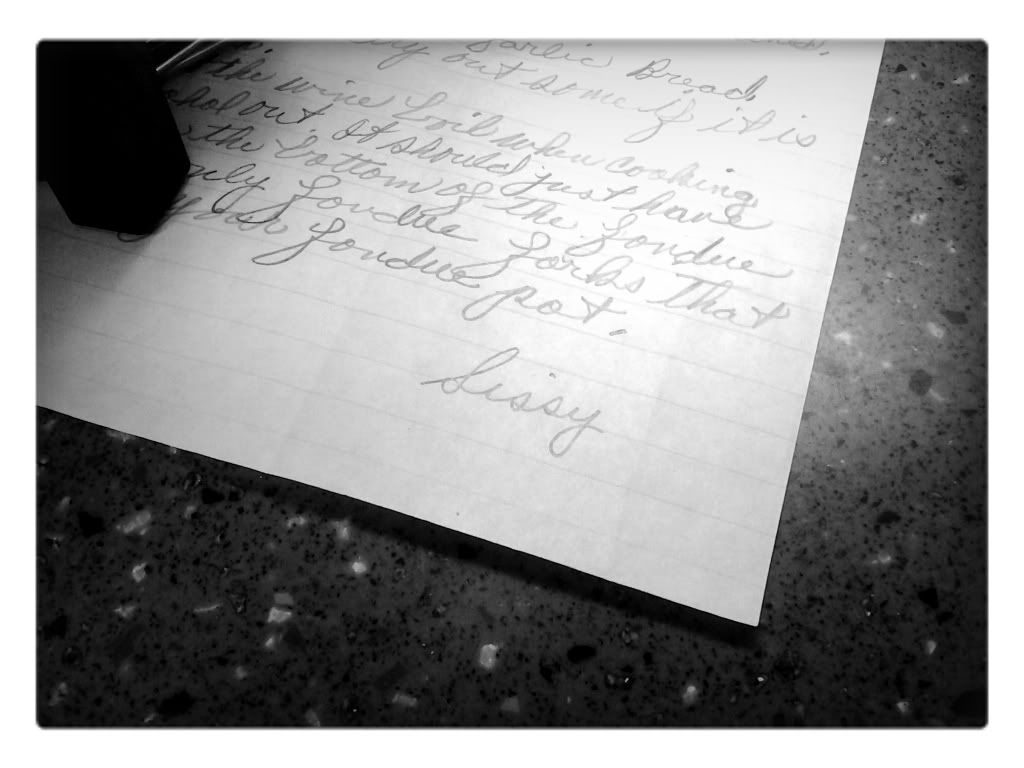
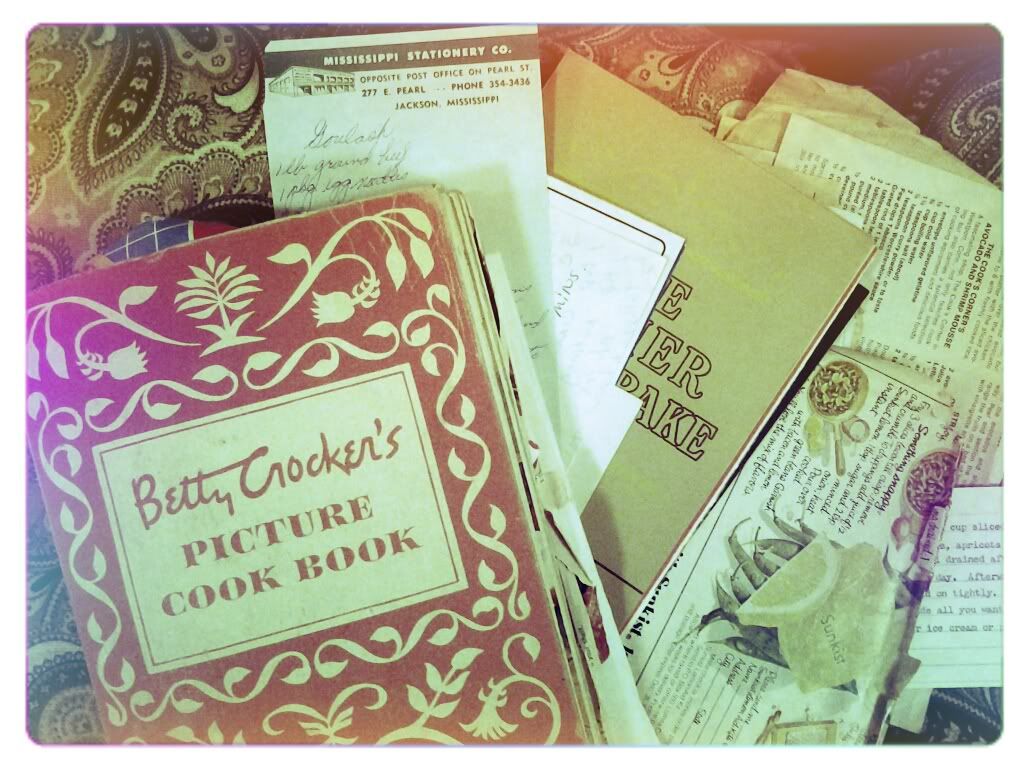
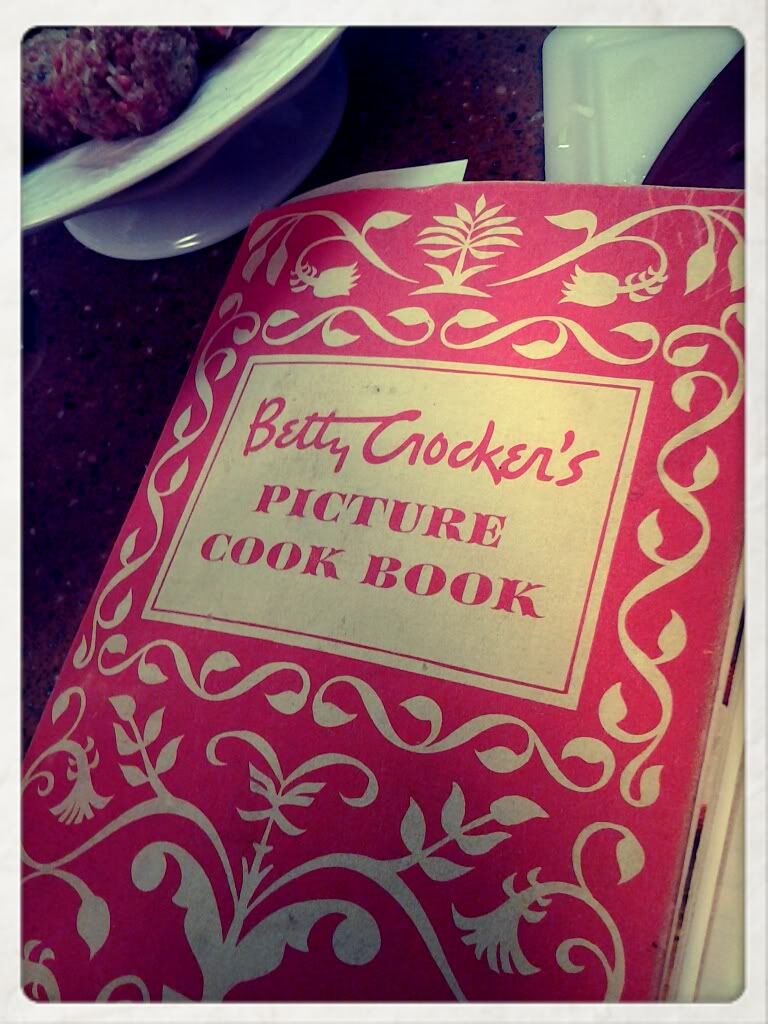
The sauce is thick and hearty with chunks of stewed tomatoes and caramelized onions. I should just hush and tell you how to make this flavor explosion for yourself. Get out the 1950's Betty Crocker book. This one's right out of it, mostly.

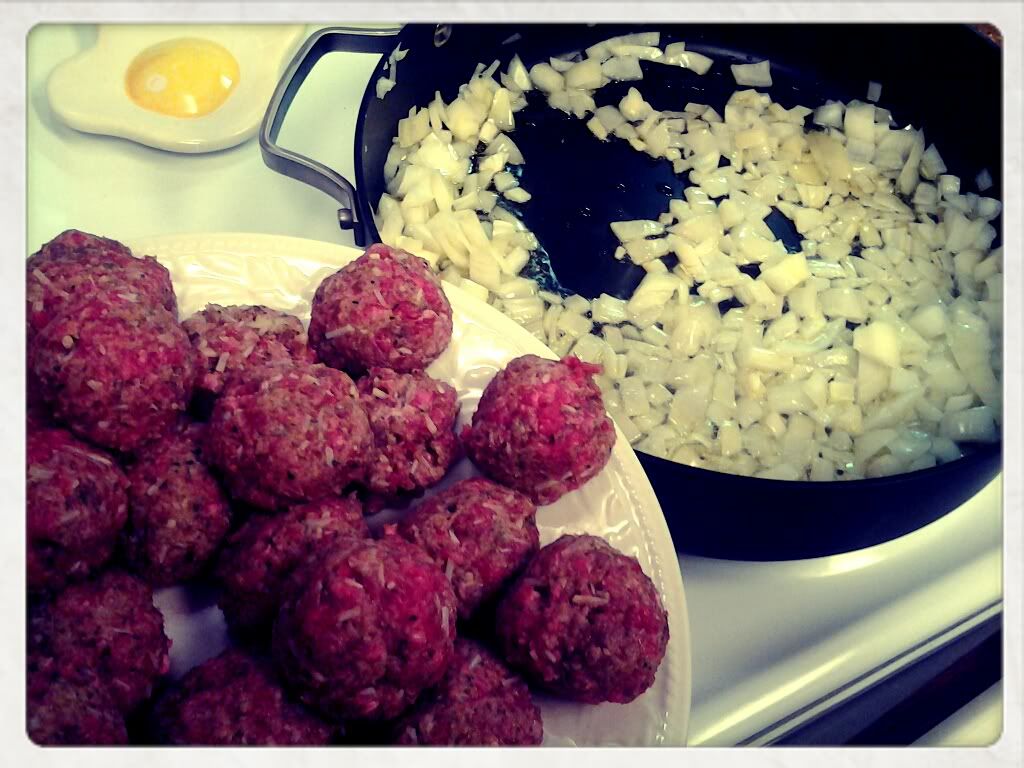
For this batch of meatballs, we're gonna brown the meatballs first, instead of letting them cook entirely in the sauce as with the Swedish
meatballs.


  Spaghetti with Meatballs
1 lb ground beef
1/4 lb ground pork (I used 1.25 lb beef)
1 cup fine dry bread crumbs
1 TB minced parsley
2 small cloves garlic, minced
1/2 cup milk
2 eggs
2 tsp salt
1/2 tsp pepper
4 TB olive oil
1 cup minced onions
5 cups cooked tomatoes (2 #2 cans)
6 TB chopped green pepper
2 1/2 tsp salt
1/2 tsp pepper
3 tsp sugar
2 tsp basil
2 small bay leaves crumbled
1 tsp dried rosemary 
2 tsp Worcestershire sauce


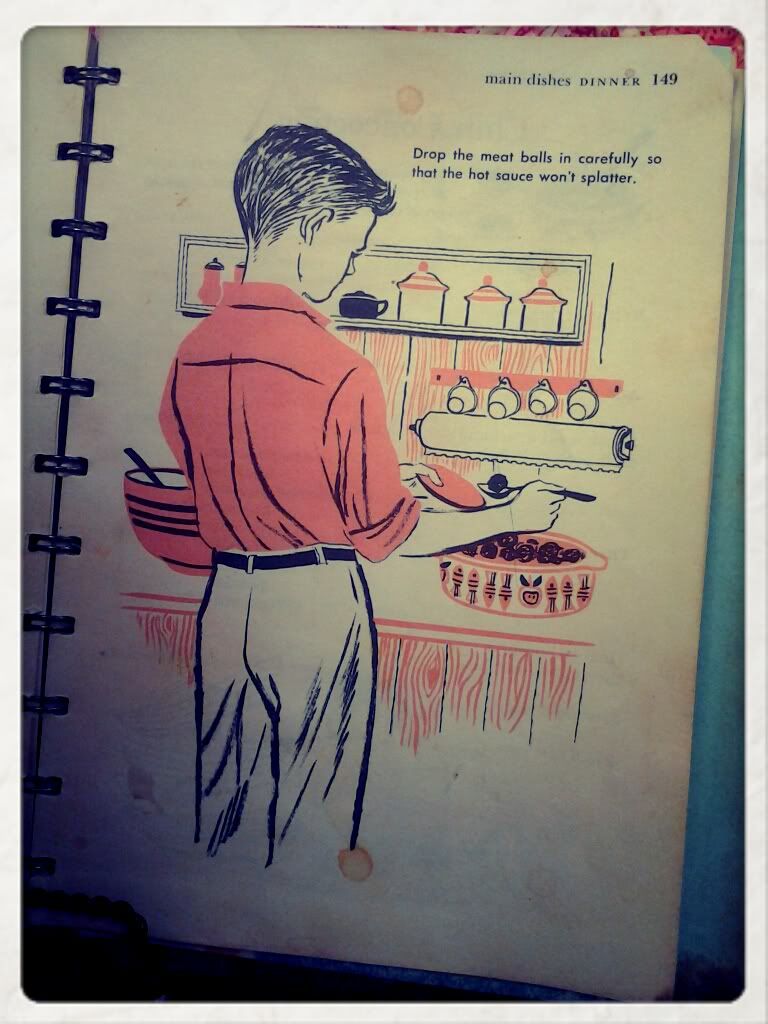
Mix first 9 ingredients and form into 1 1/2 inch balls. Add oil and onions to skillet and saute. Add meatballs to skillet and brown. I made a great mistake here and it tasted so good, I'm going to tell you about it. I got impatient and ADD and all that stuff that happens to me in the kitchen and I just about burnt the onions. I mean so bad that I almost cut up another one and started over, in fact, some of them were so stuck to the meatballs I cut them off with a knife. Take your onions to the edge, people. You will bring out a sweet smokiness that sets off your sauce. There is a difference in caramelized and burnt. It is a VERY fine line.
Okay, I'm off my browned onion soap box.  :) 
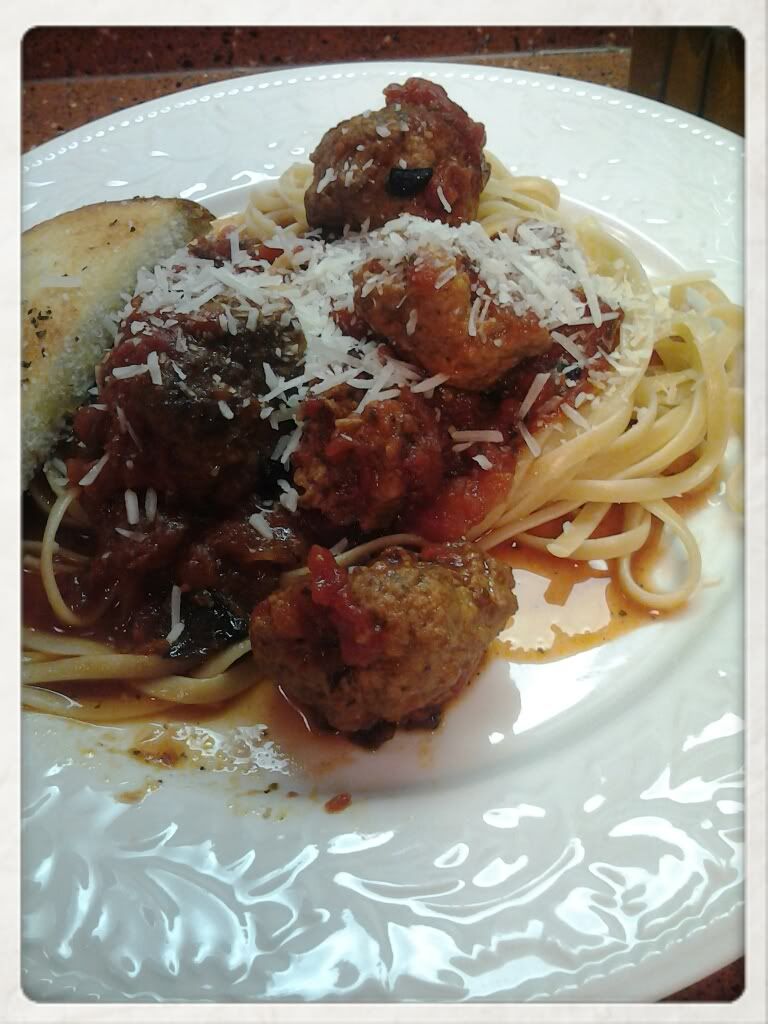
 Time to make the sauce! Add the remaining ingredients and simmer about an hour. No, don't just throw them in.  You're gonna drain about 1/4 the juice from the tomatoes. I used whole tomatoes and whipped them in the food processor. They weren't pureed or anything just broken apart. Did I mention this sauce excites me? So much so that I scraped the last of it out of the pan to save for bruschetta? Anyway, after this sauce simmers, just serve it up on a bed of noodles. We didn't happen to have spaghetti in the house, so I used linguine. So yum. I'm going to show you the picture again now. Oh, and I'm going to tell you my hubby who doesn't normally care for leftovers, ate this for lunch two days later and it was even better. All three of us helped clean the bowl. 

Stay tuned for strawberry cake! 


Monday, February 27, 2012

Buttermilk Cake & Mocha Chocolate Frosting

Buttermilk cake? Mocha Chocolate frosting?  YES. PLEASE! Anyone who ever visited Sissy had some kind of cake at her house. Sissy always had cake. I think she bought cake pans by the pallet and I think she must have baked four or five cakes a week. I found this Buttermilk cake written in her own hand writing and I was intrigued or at least very hungry. I don't know how that last one could be possible as much as I've been baking lately, but in my defense, I have been sharing. ;)
I found this particular recipe while I was thumbing through a stack trying to make a plan and a grocery list. You see there are just so many pieces of paper and clippings and notes stuck here and there throughout the three books I brought home, it's easy to get distracted. I spent an hour just trying to put some of the recipes in sheet protectors so they didn't suffer any more damage than has already been done by time. Anyway, this cake and frosting were well worth the effort, plus it was a great excuse to use my new homemade vanilla extract and that buttermilk I had left from the Angel Biscuits.


Buttermilk Cake

3 cups sugar
3 cups flour sifted
1 cup buttermilk
1 stick margarine
1/2 cup Crisco shortening
1/2 tsp soda (I used 1 tsp)
(1 tsp salt)
5 whole eggs
2 tsp vanilla


There were NO INSTRUCTIONS on the recipe. Just an ingredients list. Hello google. Yes, I looked over several buttermilk cake recipes and kind of followed suit. You can't make this stuff up, people. Oh wait, yes you can.

Step 1. Cream the Margarine and Crisco until fluffy. I use a Kitchenaid Stand mixer for all my baking so I run it on low for about thirty seconds, then on med, then on high, until it reaches a whipped consistency.

Step 2. Add the sugar and continue to whip.

Step 3. Add vanilla.

Step 4. Mix the soda, salt, and flour together in one bowl and mix the eggs and milk in another. I used a pourable measuring cup. Add the liquid and dry ingredients in alternating portions while mixing. This is where the Kitchenaid comes in handy because it's hands free, but you can alternate and use a hand mixer, too.

I baked this in a preheated oven. About 350F for 50 minutes in a bundt pan. There was too much batter, so I wound up making 8 cupcakes, too. They bake for about 25 minutes at the same temperature.

The batter is VERY thick. It's like a very heavy pound cake and the taste reminded me of a very sturdy twinkie. I will make this again and possibly add a bit of oil or water to make it more moist. The dryer tops of the muffins taste like sugar cookies. I LOVE it with the Mocha Chocolate Frosting which I added while the cake was still warm. It made a sort of shell as it cooled, but next time I make this cake I will try a peanut butter frosting between the cake and the Mocha Chocolate, much like the TastyKake from Philly (introduced to me by my lovely Philly-Italian neighbor), or perhaps I will make it in three thin 9" layers and use a creme filling. Okay, I'll just admit now, that while making this I had to kneewalk myself to the drawer in the kitchen where I keep my Metformin, and I spent at least two hours in a time warp sugar coma on the sofa. I mean LOOK at this thing!


Mocha Chocolate Frosting
6 TB Cocoa (Hershey's unsweetened)
6 TB Hot Coffee (I love French Roast Starbucks)
6 TB Butter
1 tsp vanilla extract
3 cups confectioner's sugar (10x powdered)*


So easy...Combine coffee and cocoa, add vanilla and butter, beat until smooth. Add sugar gradually, still mixing, until it is well blended and spreading consistency. * I actually used closer to 4 cups, maybe 3 1/2 because I had a small box and I think that was what was in there. If you want this frosting to be workable, you can apply to a hot cake in a pan, or spread it over a warm bundt cake like I did. I love the way it sets after it's cooled.

There you go! Don't hurt yourself. I'm still looking for that strawberry cake recipe, and I can't WAIT until it warms up enough to make ice cream. I've found several recipes for that. You'll probably be on your own for the peach version, since I can't get really great peaches here in Alaska, but I do remember her making chocolate and vanilla flavored for us.

Coming up..More meatballs, the spaghetti variety from Sissy's red Betty Crocker Book.

Sunday, February 26, 2012

Easy Swedish Meatballs

Seriously, It doesn't get much simpler. Most of the ingredients are canned. This came from an adorable book first published in 1957.  I got the publishing date from a listing on ETSY since the title page is missing from our copy. The first page in our book is "Meet Our Home Testers" which is a page of sketches of the kids with quotes like, "We learned what things mean, like baste and fold and sift."  I am not ashamed to admit, this book is educational. Anyway, I was drawn to it because I love all things vintage, but I this recipe was brought to my attention by my Uncle Greg. He said Sissy made this for them (him and his brothers) when they were kids.

I was a little skeptical at first. I mean, the ingredients include condensed chicken with rice soup. It just seemed strange to me, but I've eaten corned beef hash from a can before, so I cannot be too judgmental.  Oh and just wait until I highlight a fried SPAM sandwich. Yes, thank you, Sissy,  for that nugget of culinary wisdom. But I digress.  Let us continue with tasty meatballs circa 1957.

Ingredient List
Swedish Meatballs:
1 TB Butter
1 chopped green pepper
1 minced onion
1 10.5 oz can cond. chicken/rice soup
1 10.5 oz can cond. tomato soup
1 14 oz can water or beef broth

2 slices soft bread
1/4 cup evaporated milk
1 egg
1 tsp salt (I used 2)
1 lb ground beef (I used 1.25 for 24 balls)

Swedish Meatballs..."A wonderful way to dress up ground beef"  That's right from the book in case you didn't know. I thought I would tell you that part before we begin. Melt butter in a frying pan. I used a 12 inch with taller sides and a lid. Add pepper and onion and cook until tender. Stir in the soups and broth and bring to a boil, then turn heat down to simmer. While the sauce cooks, make meat balls. Put the remaining ingredients in a bowl and mix thoroughly. Shape into balls about the size of a ping pong ball. Drop the balls carefully into the simmering sauce and cook on low/med heat for about an hour, stirring every ten minutes to keep from sticking.

It's as easy as that. I told you this was a kid's cookbook. If you can pick up a copy of it on ebay or Etsy, you should. It's a really well written book with illustrations and definitions. I plan to use some of the recipes with my ten year old.  I don't know which kid recipe tester is pictured above, but I'm guessing it's Ricky. He said, "We always said what we thought, even if it wasn't complimentary." WOW!  I know where he didn't eat! Anyway, I'm glad he was honest about the meatballs.

The sauce was creamy and flavorful. This would be a great make ahead meal because they ARE good reheated, and I'm sure you could work out the timing in a slow cooker as well. I'm thinking you could probably also change up and season the sauce with some basil and oregano and add some diced tomatoes and serve on spaghetti noodles for an Italian twist.  Oh, and they were good with the Angel Biscuits. 

Your next recipe: Buttermilk Cake (and Mocha Chocolate Frosting if you are so inclined)

Kim

Saturday, February 25, 2012

Angel Biscuits


YUMM!  Fluffy, flaky, buttermilk, angel biscuits!  I found this recipe stashed with Sis's. It's not written in her own hand, but many of her recipes aren't. She worked at the telephone company for a number of years, and there are countless recipes that were shared among co-workers.  In fact, one of the most famous cookbooks sold in Mississippi is Bell's Best. There are a few volumes of it, but I have what I believe to be a predecessor to this book. If you don't know the book I'm talking about, you can click  here to read about it or purchase a copy from the Telephone Pioneers Chapter of MS. Sissy was a member all of my lifetime. The older book I'm referring to is the one pictured below. South Central Belle's Recipes, from the Traffic Women of Jackson, Miss.


This book was compiled in 1970! 


I am currently looking through it for recipes submitted by Sissy. I found one on the same page where there was an old A&P receipt from 1979. 
Cheese Rolls! More to come on that. 


 Like most Southerners, I adore a good biscuit. It's the foundation of breakfast. I made a few of these trying different things and they still need a little tweaking, so I will probably update this recipe at some point in the future. For now, I'll give you the original and some minor adjustments.  I love the letterhead for the Southern Bell employment office!


Angel Biscuit Ingredients:
5 cups flour
2 cups buttermilk
1/2 cup sugar
1 cup fat (Crisco)
1 tsp. baking soda
3 tsp. baking powder
1 tsp. salt (I used 2)
1 cake yeast (2 envelopes)


 Yes, this recipe actually says 1 cup FAT. That cracks me up. I guess it does sound better than LARD! I also have NEVER ever seen a cake of yeast. I had to google that one. Generation gap, much. Anyway, It's my guess that we might be able to use self rising flour here, much like the Hot Rize corn meal mix instead of corn meal, powder, soda, and salt, but I love the smell of bread with yeast.


According to the recipe, you need to dissolve the yeast. (Follow package directions.) Then cream the buttermilk, fat, and yeast. Combine dry ingredients and add to liquid. Mix well.


Roll dough onto floured surface to 1" thick.
Cut, dip in butter, stack or leave single, and bake in preheated oven.


Since there was no temperature listed, I turned to google again. Most biscuit recipes call for 15-20 minutes at 400F, and that worked fine for me. In fact I tried a lower temperature, but the biscuits didn't rise as well. Hotter is better. 


This recipe made 28 biscuits. I baked them all because I was experimenting, but I'm sure you can freeze them to use when you need them. Granny Beck does that all the time.

 A very special thanks to my mom for making sure I got this vintage biscuit cutter.  Soon, I'll be blogging recipes from that side of the family, too. This simple little guy really gets the job done, and it's the perfect thickness, too.


These biscuits have a slightly sweet taste, but are still fantastic under gravy, syrup, or jelly, and they are strong enough to make a biscuit sandwich with sausage or bacon and eggs. I'm going to make Swedish meatballs tonight and put some of the sauce on one.  I'll switch back to wheat toast on Monday morning. : ) Sissy would approve.


Thursday, February 23, 2012

Mexican Cornbread and a Broccoli Bonus

OH YES, Boys and Girls, 
It's Mexican Cornbread time. When else would you have it but Taco Thursday? Another Sissy classic, this dish has it all. The preparation is a breeze and then you can pop it in the oven and have plenty of time for clean up while it bakes. 

This may be cooked the old fashioned way in a seasoned cast iron skillet, or you may opt to bake it in a glass casserole. I baked mine in a skillet because I just happen to have a fantastic 10 3/8 inch glossy black,  deep dish fryer that my brilliant husband picked up for $28 at an antique store. If you don't know about cooking in cast iron, I suggest you google how to season your pan with oil, before using it the first time. We always look for cast iron in antique and thrift stores because the older pans have completely smooth interiors, and the new ones have little bumps that just don't release the bread (or other foods) like they should. 

Now, if you do have a seasoned skillet, you might already know this part if you've ever made cornbread, but I'll talk about it anyway for folks who might not. When you use the skillet, you put about a TB of oil in the pan and spread it all over the interior surface. I use a paper towel to spread mine. Put the oiled skillet in the oven while you are preheating it. When your batter is ready, you will pull out your HOT skillet and pour the batter in. When it's done, the bread releases like a dream.  


On with the show!
Here's the ingredient list for Mexican Cornbread.
Batter:
1 1/2 cup corn meal 
3 tsp. baking powder
1/2 tsp. baking soda
1 cup buttermilk
1 can creamed corn
2 eggs
1 tsp. salt
3 TB chopped bell pepper
2 jalapenos chopped (I used 2 heaping TB diced)

Filling:
1 lb ground pork sausage, browned and crumbled
1 cup shredded cheese (cheddar or Mexi-blend)

Preheat oven to 425F. Now's the time to put your skillet in if you are using one. Brown sausage, drain, and set aside. Mix all batter ingredients. Take the HOT skillet out of the oven very carefully and place it on a heat resistant surface. If you are using a glass casserole dish (do not preheat), you need to grease it or spray it with a flour release like "Baker's Joy".  Pour half of your batter in the pan, then spread the sausage and cheese. Pour the remaining batter on top and spread evenly. The original recipe says cook 45 minutes or until brown. In my oven it only took 32 minutes, and a few of the other recipes I found said 20-25 minutes. You should probably watch it, so don't get too distracted when you are cleaning the kitchen. ; )  If you smell the tasty, corn tastiness in the air, you should probably look at your bread.  A knife inserted in the middle should come out clean if the bread is done. 


After baking, let it "rest" and cool before flipping it out of the pan. I tasted mine while it was still warm, and I definitely liked it better after it cooled. Sis kept this one and broccoli cornbread in the fridge after she baked them. I chose to garnish mine with sour cream, green onions, and a little more cheese. This is hearty enough to be a meal alone, especially if you pair it with a fresh green salad and  tomatoes.  

A note about corn meal vs. corn meal mix. This recipe calls for corn meal AND powder AND soda. If you get corn meal MIX, you may omit the powder and soda. Little Martha White has been kind enough to add them for you. When people stopped making their own cake batter and started buying boxed ones from the store, they quit keeping staples like baking powder and soda in the home. I thought for the longest time baking soda was used for making things smell better. It never dawned on me you might actually bake with it. 


Like the fondues, this cornbread usually got baked in pairs to keep everyone happy. Its partner is the broccoli cornbread I promised as a bonus, so here ya go! I won't be as detailed here, because now you are a cornbread expert and you can figure out how to pour the batter in the hot skillet. 


Broccoli Cornbread

10 oz frozen broccoli cooked and drained
2 eggs beaten
1/2 cup chopped green onions
1 cup grated cheddar
1 tsp salt
1/2 stick margarine melted
8 oz sour cream
8.5 oz box JIFFY cornbread mix

Bake at 400F til brown
28 to 30 minutes

This one is AH-MA-ZING with  potato soup. I guess I'll  have to find that recipe for you soon, but for now
you will have to hang out and wait for Buttermilk Cake with Mocha Chocolate Frosting, Swedish Meatballs, and maybe some Angel Biscuits.

Guess who will be doing two a days at the gym?! It's a sacrifice I'm willing to make for you. Okay, well for you and strawberry cake. That's my next recipe search. What are you hungry for?

The Fondue Two

So, I figured I would start with a Sissy classic. Fondue. Was your favorite meat or cheese? It doesn't really matter, she almost always made both. My cousin Jennifer said it best, "There wasn't just one pot of fondue going, there was two. Just to make sure everyone was happy :) I would love to know how many loaves of bread she cooked between the fondue and her dressing."  I'm sure the bread thing doesn't make sense to you now if you've never had Sissy's fondue, but keep reading. You shall be enlightened...right before we fatten you up. You look hungry.
fondue pot

Go get out your fondue pot. Really. If you don't have one, purchase one. They are about $20 and they come with the forks. You're going to need those for the cheese version. Using a fondue pot is the best way to make this because the temperature stays even, plus you can serve in it. The fondue is meant to be eaten warm, although there were plenty of times when we had the leftovers heated in the microwave from a Country Crock Margarine container. Remember those? Cheap "Tupperware". Our fridge looked like we had some kind of vegetable oil spread addiction. Nope, just Sissy bringing us food. It was a major score when you found the one with chicken and dumplings in it. Mmmm.

Okay, on to the recipes. There were two different versions available to us, meat and cheese. I'll start with the cheese since it's practically the base for the meat version.
Rhine wine and fondue forks

Ingredients: Cheese Fondue
1 Cup Rhine wine
1 lb Kraft Deluxe American cheese
1 (10 oz) can Ro-Tel tomatoes and green chiles-mild

Step 1: Simmer wine in fondue pot about 10 minutes, but don't boil it. Just let it bubble in the pot. My particular pot does this at a medium setting, but I have to lower the heat about 6 minutes in. This is where you learn about cooking slowly and patiently and staying with what you are cooking. I burned up a fondue pot once because I was being impatient and put everything on high heat. Sissy wrote notes for me in the original of this recipe. It would drive her crazy when I cooked on high. I know why now.  She also told me to use a plastic fork so I wouldn't scratch the "Tefla" coating on my pot. You should do the same. ; )

Step 2: Add cheeses to simmered wine one slice at a time and stir each addition until melted.

Step 3: Liquify Ro-Tel in a blender or food processor. It will be sort of pink and frothy. Add to melted cheese.

Step 4: Serve with toasted garlic bread squares. (Remember the bread comment?)  Yep, Sis would toast loaves of bread and chop it into little 1" squares for us to eat with our fondue. Sissy Hint: If your bread is really fresh, let it dry out some before toasting. It makes it firmer and easier to cut.

Ingredients:Meat Fondue
1 lb ground chuck, browned, drained, and crumbled
2/3 cup Burgundy wine
1/2 lb Velveeta Mexican cheese (mild)
1/2 lb Velveeta cheese
1 (10 oz) can Ro-Tel tomatoes and green chiles-mild

Step 1: (Assuming you have already browned your beef) Simmer wine as with the cheese fondue.

Step 2: Slice and add cheeses one piece at a time and stir until each addition is melted.

Step 3: Liquify Ro-Tel in a blender or food processor. It will be sort of pink and frothy. Add to melted cheese.

Step  4: Add meat and warm on medium heat until fondue is thickened.

Step 5: Serve with tortilla chips.

handwritten recipe
Again, these are meant to be served warm, but that never stopped us from spooning hunks of this meat fondue over tortilla chips right out of the fridge and microwaving it. Either dip can be re-heated in the fondue pot if there is any left. I remember us kids being crowded around waiting for more toast squares. I don't know how she kept up.

Speaking of keeping up, this is perfect football food. How many games do you think she was following at one time? Let's see...the radio and TV in the bedroom, the TV in the living room, the radios in the two guest rooms. That's five by my count. I distinctly remember some LSU and MSU players being called "TOADS,"  too.

Wednesday, February 22, 2012

Tribute

"Sissy" Circa 1997
"Are you hungry?"
"I just made fondue. I have Chex Mix. Are you sure I can't get you something to eat? Have you eaten? How about a sandwich?" 

When you showed up at Sissy's that's what you heard just as sure as the greeter at Wal-Mart saying "Welcome to Wal-Mart." It was her thing. Sissy fed us all. 

We had big Sunday dinners, breakfast, supper, any day of the week supper, and all the snacks you could cram between those meals. Feeding us was  her love language. She was always in the kitchen. She was the only person I knew who didn't have a worn spot on her sofa cushions. She just didn't go in there. 

Since she passed away, we've all been looking for recipes she used. We all have our favorites. I don't know how many times I've been asked, "Hey, do you have Sissy's (fill in the blank) recipe?" "Remember when she used to make that for us?" 

On a trip home to my dad's this summer, we opened a box of her cookbooks and found the book of books. Her red Betty Crocker with all the hand written recipes and notes. Our family history is in this book. Not literally, but it's there between the lines. Its in the memories evoked through the tastes and aromas conjured up when we prepare these dishes. 


My heart beat all too quickly as we thumbed through the pages. I couldn't possibly bring them all on an airplane with me, and I wasn't about to let them be checked baggage or mailed. Too Risky. Finally, I bagged what I thought was most important and left a stack in order of priority, to be swapped out later. I carried that bag like it was full of gold. Twenty hours of flying from Mississippi to Alaska, and I don't think I took my eyes off the bag once.

 My big goal was to scan and catalog all the recipes and make a family cookbook, so everyone would have the recipes, and photos of her original notations in the books. I started to scan them once I got home and found that it was all just too mechanical. You see, these aren't just recipes. Remember? They are little pieces of our family's history.

Every time you waited for that "something to eat" you were also getting quality time with whomever was sharing the seat next to you, and better yet, quality time with Sis. Someone was asking you how your day went. There were no cell phones on the table, no computers, no ipods. Just talking and laughing. And eating. Lots of eating.  So, that's why the scanning and cataloging just wasn't right for this. This blog is a tribute. It is a journey through recipes from my father's and uncles' childhood, as well as my brothers', cousins', and my own. Generations of one little lady feeding us all. 

I hope you'll follow. Each post will be a new recipe taken right from the books. Old school cooking.  This isn't to win a health foods contest or creative recipe match. This is preservation of what has already been done. I will also be preparing each recipe as I blog it, so it will take some time. Hopefully my family members will  request their favorites, so I can get started on those first. And it is my sincere hope that they will share their memories of her with me so we can add them here with the food. 

Welcome to Sissy's Kitchen. Can I get you something to eat?